Phase3D today announced the release of two new large-format Fringe Inspection™ Systems for metal additive manufacturing. The new systems, Large Format Fringe Inspection™ and Large Format Fringe Inspection™ Hi-Rez, extend Phase3D’s in-situ inspection technology to support the EOS M 400 series of printers and other large-format platforms such as the Nikon SLM NXG product line. Both can be retrofitted to additional machines with build areas up to 600 x 600 millimeters.
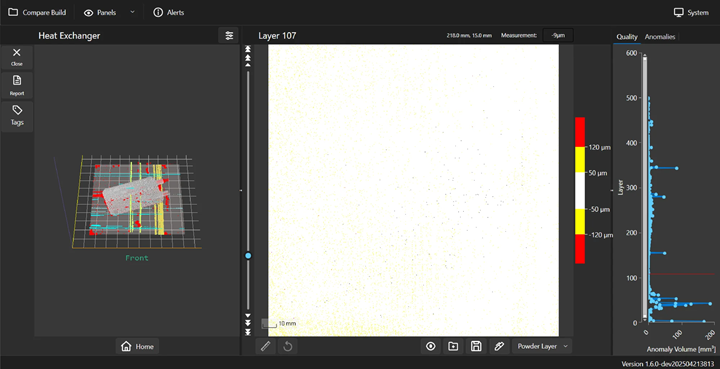
Fringe Inspection™ is the industry’s only in-situ structured light inspection system that delivers unit-based, quantitative measurements during the additive process. Using structured light projection and proprietary calibration, the systems achieve ±10 µm vertical accuracy, 60 µm spatial resolution, and repeatability of 5 µm at the calibration plane. These measurements provide real-time insight into layer height, deposition consistency, and melt surface quality, all critical for detecting anomalies such as short feeds, chatter, protrusions, over-melting, and recoater interference.
Expanded Capability for Large-Format Systems
Phase3D now offers two configurations tailored to the needs of large-format additive users:
-
Large Format Fringe Inspection™ – 100 µm pixel size for production environments
-
Large Format Fringe Inspection™ Hi-Rez – 60 µm pixel size for advanced, data-driven R&D
Both configurations provide full build plate coverage for large laser powder bed fusion systems while maintaining NIST-traceable calibration and optimized performance for speed, repeatability, and integration flexibility.
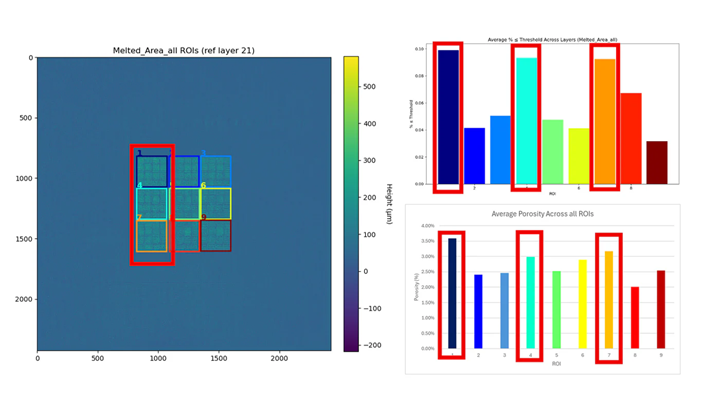
Phase3D has recently published and presented results showing a causal link between in-situ layerwise surface roughness measurements and specimen density, enabling immediate prediction of final part quality based on porosity. This discovery allows manufacturers to connect in-situ data directly to part integrity and accelerate qualification workflows with confidence. For more on this, visit this page.

Enabling Efficient Delta Qualification
The Large-Format Fringe Inspection™ Systems introduce a new capability for efficient delta qualification across additive manufacturing platforms. Using deterministic heightmap data, AM users can now compare print and part quality between single and multi-laser systems of different brands and build sizes without requiring full requalification campaigns.
This approach enables organizations to demonstrate process equivalency and machine conformance through direct, unit-based measurement, significantly reducing qualification timelines and costs. The result is a path toward cross-platform qualification, allowing production to move seamlessly between machines while maintaining assurance of dimensional and material integrity.
Adoption by Aerospace Prime Contractor
An aerospace prime contractor has adopted the large-format system to address challenges in CT scanning of large, dense metal components, a process often limited by material attenuation and geometry. By using Fringe Inspection™, the customer now leverages in-situ height-based data to verify build quality and mitigate CT requirements.
In the next phase, the same dataset will support qualification and certification efforts, correlating layer-wise measurement data with mechanical performance and ensuring compliance with standards such as SAE AMS7032.
“Scaling Fringe Inspection to large-format systems demonstrates our commitment to enabling qualification through direct measurement, not inference,” said Dr. Niall O’Dowd, Founder and CEO of Phase3D. “Aerospace manufacturers are realizing that in-situ data with units, accurate to microns, can replace the uncertainty of post-build inspection. This is how qualification moves from months to minutes.”

Enabling Standards-Based Qualification
The large-format Fringe Inspection™ systems integrate with Fringe Qualification™ software for deterministic data analysis, traceable reporting, and automated anomaly documentation. All measurements are NIST-traceable, making the systems suitable for quality assurance and qualification frameworks across aerospace, defense, and industrial applications.


Share: